Consent Mode v2 has been mandatory for Google advertising in the EEA since March 2024. If you are using Cookiebot as your consent management platform and Google Tag Manager to deploy tracking, you need both talking to each other correctly.
Most setups I audit have Cookiebot installed but not properly connected to Consent Mode. The banner fires, users make choices, and then tracking ignores all of it. This guide covers how to do it properly.
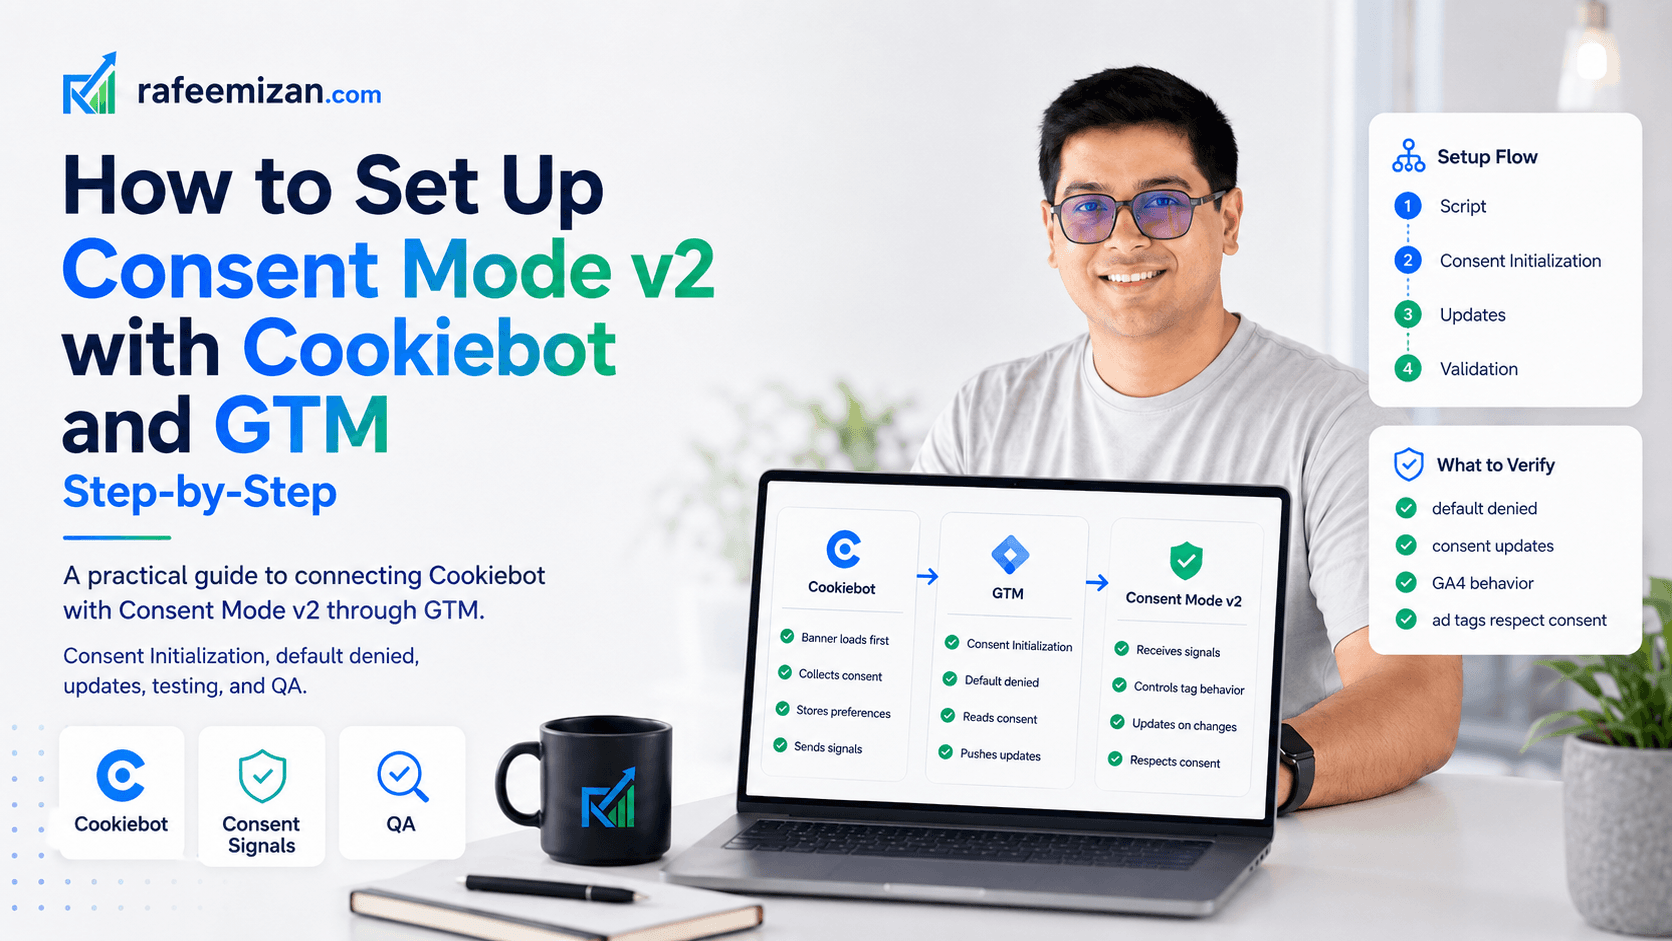
What you need before starting
- A Cookiebot account with an active domain
- A Google Tag Manager container live on the site
- GA4 property configured
- Access to create and publish GTM tags
Step 1: Add the Cookiebot script via GTM
The first thing to get right is how Cookiebot loads. It must fire before any other tags — including GA4 and any ad pixels.
In GTM:
- Create a new Custom HTML tag
- Paste the Cookiebot script with your domain group ID:
<script id="Cookiebot" src="https://consent.cookiebot.com/uc.js" data-cbid="YOUR-DOMAIN-GROUP-ID" data-blockingmode="auto" type="text/javascript"></script>- Set the trigger to Consent Initialization — not All Pages. This is important.
- Set tag sequencing so this fires before all other tags.
The data-blockingmode="auto" attribute tells Cookiebot to automatically block third-party scripts until the user consents. This is what actually prevents early tracking.
Step 2: Set default consent state
Consent Mode works by setting a default state before the user makes a choice. Without this, Google assumes no consent.
Create another Custom HTML tag with this code:
window.dataLayer = window.dataLayer || [];
function gtag(){dataLayer.push(arguments);}
gtag('consent', 'default', {
  'ad_storage': 'denied',
  'ad_user_data': 'denied',
  'ad_personalization': 'denied',
  'analytics_storage': 'denied',
  'functionality_storage': 'denied',
  'personalization_storage': 'denied',
  'security_storage': 'granted',
  'wait_for_update': 500
});
Set the trigger to Consent Initialization. This tag must fire before the Cookiebot tag.
The wait_for_update: 500 parameter tells Google to wait 500ms for a consent update before sending any data. Adjust this if your CMP loads slowly.
Step 3: Configure Cookiebot to update consent
Cookiebot has a built-in GTM integration. In your Cookiebot dashboard:
- Go to Your domains
- Select your domain
- Click Integrations
- Enable the Google Consent Mode v2 integration
This pushes gtag('consent', 'update', {...}) calls when users accept or decline cookies. You do not need to write this yourself.
Verify it is working by checking the GTM preview: after a consent decision, you should see consent as an event in the data layer with the updated parameters.
Step 4: Configure your GA4 tag for Consent Mode
Your GA4 configuration tag in GTM needs consent checks enabled:
- Open your GA4 Configuration tag
- Go to Advanced Settings > Consent Settings
- Make sure "Require additional consent for tag to fire" is NOT checked — GA4 should fire in ping mode even without consent
- Ensure Built-in consent checks are enabled (on by default in newer GTM containers)
GA4 fires in ping mode for non-consented users, which enables modelled data. This is the whole point of Consent Mode.
Step 5: Configure ad conversion tags
For Google Ads and Meta Pixel, the setup is different.
Google Ads respects ad_storage consent. When denied, it fires a ping without user data and conversions are modelled using Google's AI.
Meta Pixel requires a Cookiebot-compatible integration. Meta's integration uses fbq('consent', 'grant') and fbq('consent', 'revoke'). Add a Custom HTML tag that fires on the Cookiebot accept event: CookiebotOnAccept.
Step 6: Test the implementation
Google Tag Assistant: enable preview mode in GTM, check that the Consent Initialization trigger fires first, verify that consent parameters appear in the data layer after a user choice, and confirm GA4 fires in both consent-granted and consent-denied states.
GA4 DebugView: with consent accepted you should see full event data. With consent declined you should see a minimal ping — this confirms Consent Mode is active.
Cookiebot scanner: run the scanner on your domain and check that cookies are blocked correctly before consent.
Common mistakes to avoid
The consent default tag fires after other tags. This is the most common error. The default consent state must be set before GA4 or any other tag runs. Use GTM's Consent Initialization trigger and tag sequencing.
Cookiebot is hardcoded in the HTML outside GTM. If it loads outside GTM, the order relative to GTM tags is unpredictable. Move it into GTM.
The Google Consent Mode integration is not enabled in Cookiebot. The banner will collect consent, but no updates are pushed to the data layer.
wait_for_update is too low. If Cookiebot loads slowly, the consent update may arrive after Google has already sent data. Increase to 1000ms and test.
Only basic Consent Mode parameters. Advanced Consent Mode with ad_user_data and ad_personalization is required since March 2024. Make sure all six parameters are in your default.
How to verify modelling is working
In Google Ads, go to Tools and Settings > Conversions. Click a conversion action. If you see "Modeled" or "Data-driven" attribution, Consent Mode is working and Google is recovering unobserved conversions.
In GA4, check under Admin > Data collection > Consent Mode to see if consent signals are being received.
Wrapping up
Consent Mode v2 done correctly is not just about compliance. It preserves a meaningful portion of your conversion data that would otherwise be invisible. For most EU-based businesses running Google Ads, getting this right is directly tied to campaign performance.
I used this exact Cookiebot and Consent Mode v2 setup for a healthcare clinic's analytics implementation, where compliance wasn't optional.
If you want an independent check of your setup, I offer analytics audits that cover Consent Mode configuration. Get in touch if that would be useful.